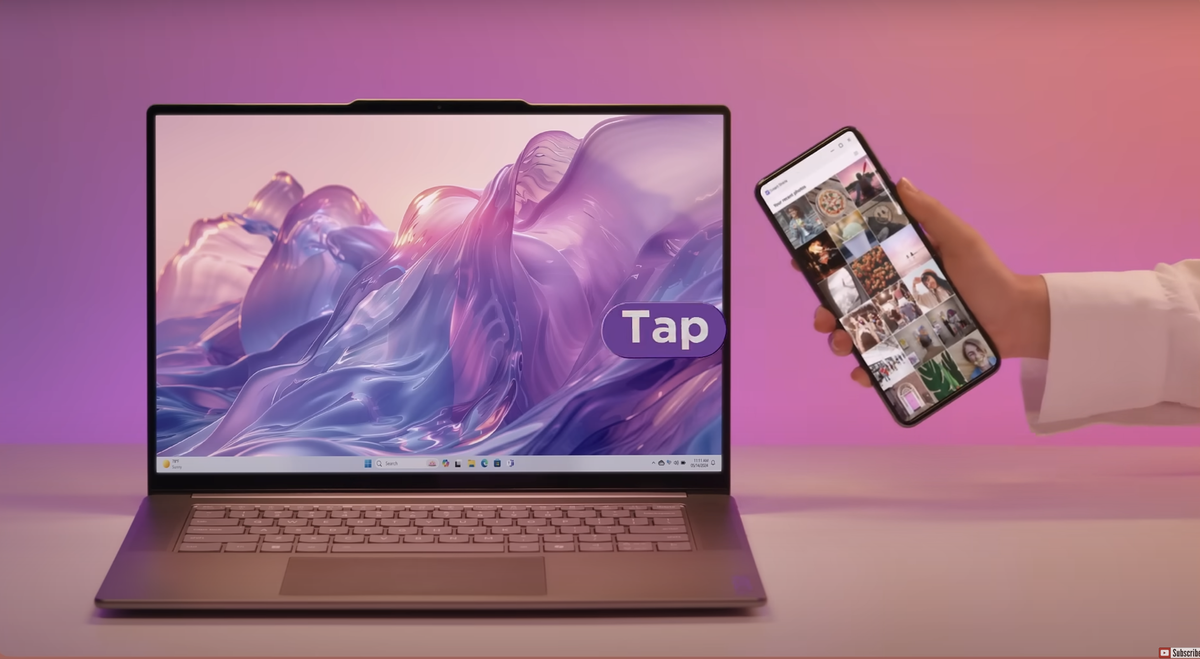
Lenovo‘s new Intel laptops powered by the Intel Core Ultra 200V processors are being branded as “Aura Edition” laptops thanks to a suite of new features like Smart Share, multi-device connect, and Smart Modes to set focus, control power profiles, and even track your posture.
Lenovo’s partnership with Intel on the Aura Edition versions of the new ThinkPad X1 Carbon Gen 13 and Yoga Slim 7i allows you to transfer photos and videos between multiple devices. And using the Lenovo Smart Share app, all you need to do is tap your phone or tablet on the Aura Edition laptop to transfer photos between your devices.
If any of those features sound like must-haves to you, but you aren’t prepared to run out and snap up a new laptop, we have some good news — with Windows 11 you might be able to find what you’re looking for free of charge.
Here’s how to replicate some of Lenovo’s new feature suite on your Windows 11 device right now.
How to set “focus” modes in Windows 11
Most smartphones have had some kind of “focus” feature setting for a few years now, and that’s eventually made its way to laptops of all types: from Windows 11 to macOS, there are ways to get your computer to keep you on task. And they don’t require a fancy new AI PC.
“Focus” in Windows 11 can show a timer for tracking how long you have until your break and can also put you on “Do not disturb.” You can also decide if you want to block notification badges on apps in the taskbar, and you can also set focus to hide flashing on taskbar apps to reduce distractions.
Windows 11’s Focus feature isn’t as in-depth as the Lenovo Aura Edition Smart Modes Attention settings, but you can get a decent approximation.
- Open “Settings”
- Select “System” then “Focus”
- Set session duration (default is 30 minutes)
- Set Focus preferences (default has all four settings checked)
- Hit “Start focus session” to begin
How to set webcam background blur in Windows 11
You can customize your laptop’s camera settings in Windows and through various virtual meeting applications like Zoom, Microsoft Teams, and Google Meet. But if you want to keep the same standard blur across multiple applications, setting your background blur in Windows 11 can make things easier.
- Open “Settings”
- Select “Bluetooth & devices,” then “Cameras”
- Select the camera you want to use
- Under “Windows Studio Effects,” toggle on “Background effects”
- Choose standard blur to apply a heavy blur to obscure background objects
- Choose portrait blur to apply a lighter blur to keep you in focus
How to change your power profile settings in Windows 11
Windows has had optional power settings for generations and has three pre-set power modes: best performance, balanced, and best power efficiency.
“Best performance” will get you the most power possible out of your laptop while “best power efficiency” will get you the most battery life possible. “Balanced” gives you the best of both.
One of the major benefits of AI PCs is the NPU’s constant background power management to get better battery life than non-AI laptops, so this won’t be a miracle cure for an old laptop with abysmal battery life. But it could get you a bit more battery or a bit more performance as needed.
- Open “Settings”
- Select “System,” then “Power & battery”
- Under “Power” select your ideal power mode from the dropdown (Windows 11 sets all Laptops to “Balanced” by default)
How to set your VPN to auto-connect in Windows 11
VPNs have been in wide use for years now, so of course custom settings for your VPN have also made it to Windows 11. While these settings may not be as useful or seamless as the Lenovo Smart Modes options, they can help quite a bit.
- Open “Settings”
- Select “Network & internet,” then “VPN”
- Add your VPN through the dropdown (not all VPNs will register)
- Under “Advanced settings for all VPN connections” toggle on “Allow VPN over metered networks” and “Allow VPN while roaming” so your VPN won’t be blocked based on your network


